One of the most difficult parts of waterfowl hunting is hiding from the birds. We wear elaborate camouflage patterns and try to hide in muddy ditches and reeds, but of course, the only real way to completely hide from the sharp eyes of ducks and geese is a duck blind. Now, most duck blinds come in two different forms, permanent and temporary, both of which have their own advantages and disadvantages.
Permanent blinds are generally more sophisticated structures erected in a consistently good hunting spot. These can range from some nailed-together two-by-fours with a camo covering to extravagant waterside cabins with bunkbeds and WiFi. These blinds offer better camouflage but also lack mobility, as moving a permanent blind to a more productive area usually takes a few people and results in a wasted day of hunting.
Temporary blinds, on the other hand, are usually a spur-of-the-moment type of thing made of stacked-up brush and a couple of logs hastily put together before first light. These structures usually lack any sort of real comfort and, while easy to move, will cost you some birds as they often stand out like a sore thumb on the shore.
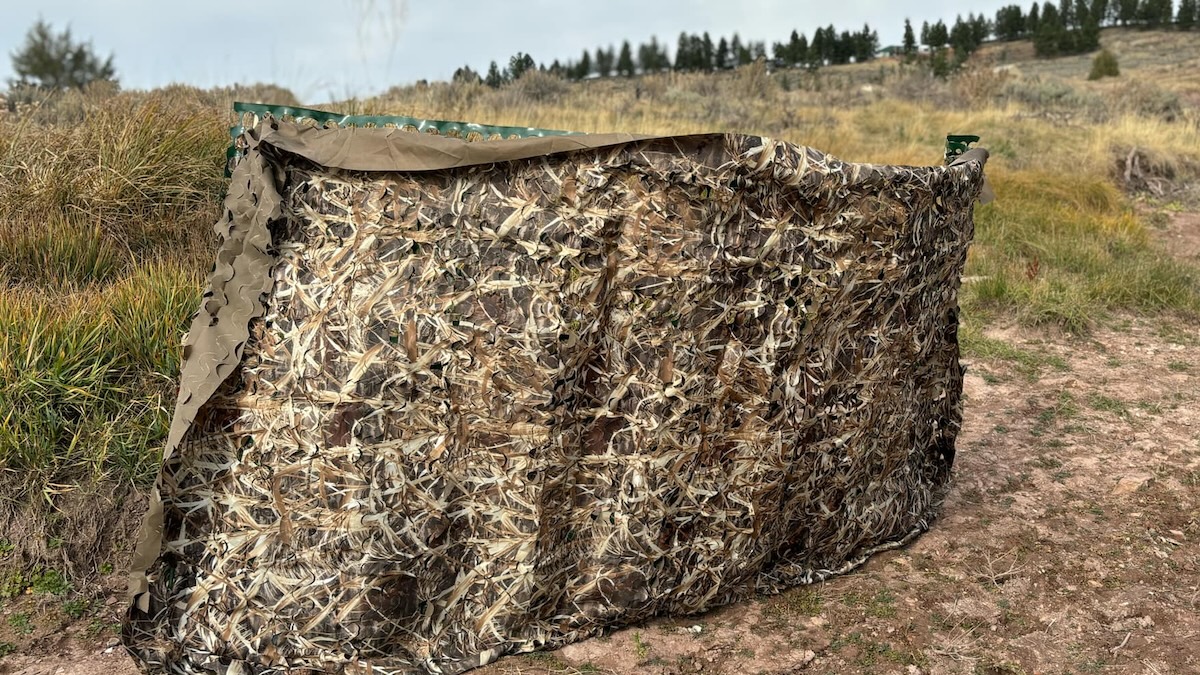
However, there’s a third type of duck blind. One that, like a pop-up ice shanty, offers mobility as you can move it from spot to spot while still giving yourself sufficient camouflage and comfort for those long days in the field. While there are a few of these portable blinds on the market, one of the best parts about these blinds is that you can also build them yourself.
Gathering Materials
Building a portable duck blind is a simple and inexpensive project that you can do weeks before or even during the hunting season. You can make it out of a variety of different synthetic and natural materials, but no matter what you choose to make it out of, it needs to be designed with the same basic setup of camouflage, framing, and support.
Camouflage material for your blind can be anything, from a sheet of camo netting to a tarp, a sheet of burlap, or even a camo bed sheet, so long as it has a decent waterfowl camo pattern. The framing for the blind needs to be made of stiffer material, roughly the same size as your camo material, and easy to shape and manipulate. This can include things like chicken wire, pond netting, or, my personal preference, plastic snow fencing.
Finally, to ensure that the blind holds up to whatever abuses you put it through, you’re going to need some sort of support structure to keep it standing during wind and other adverse weather. You can use a variety of items for this, including old tent poles, pliable tree branches, or metal, plastic, or wooden dowel rods. It’s important to note that you’re going to want to use the lightest materials possible so that your blind is easy to transport and set up as you move from hunting spot to hunting spot.
Measure Up and Lay it Out
One of the best things about making your own portable blind is that it can be any size you want. If you’re a solo hunter who doesn’t need a lot of space, you can measure and cut your materials so that the blind just covers your body. However, if you’re hunting with friends or kids or a dog and need more room, you can measure and cut one of these homemade blinds as large as you want. In fact, you can even design one of these blinds so that it’s large enough to cover an entire boat or ATV, so long as you add enough support structure for the additional material.
Once you have your width and length roughly figured out, you’re going to want to cut and then lay out your camouflage material flat on the floor. Stretch it out with—if your material is only one-sided—the camouflaged side of the material down so that you have access to every corner before cutting your framing. Your framing material needs to be trimmed so that it’s about 4 to 6 inches shorter in both length and width than your camo material so that you have a small flap extending out from the framing on every side. Lay the framing over the top of the camo material so that the flaps of excess camo are evenly spaced around the edges of the framing before adding your structure.
You’re going to want to add structure precisely so that it will support the framework while still allowing the blind to be rollable or foldable. Start by placing the sections widthwise along the length of the blind, spaced out so that you have at least 6 inches of material between the sections. This is so you can roll and fold them evenly throughout the blind when you’re both traveling and storing it. Once you’ve got the exact spacing that will reinforce the blind while still allowing it to be portable, you’ve got to start attaching everything together.

Putting it All Together
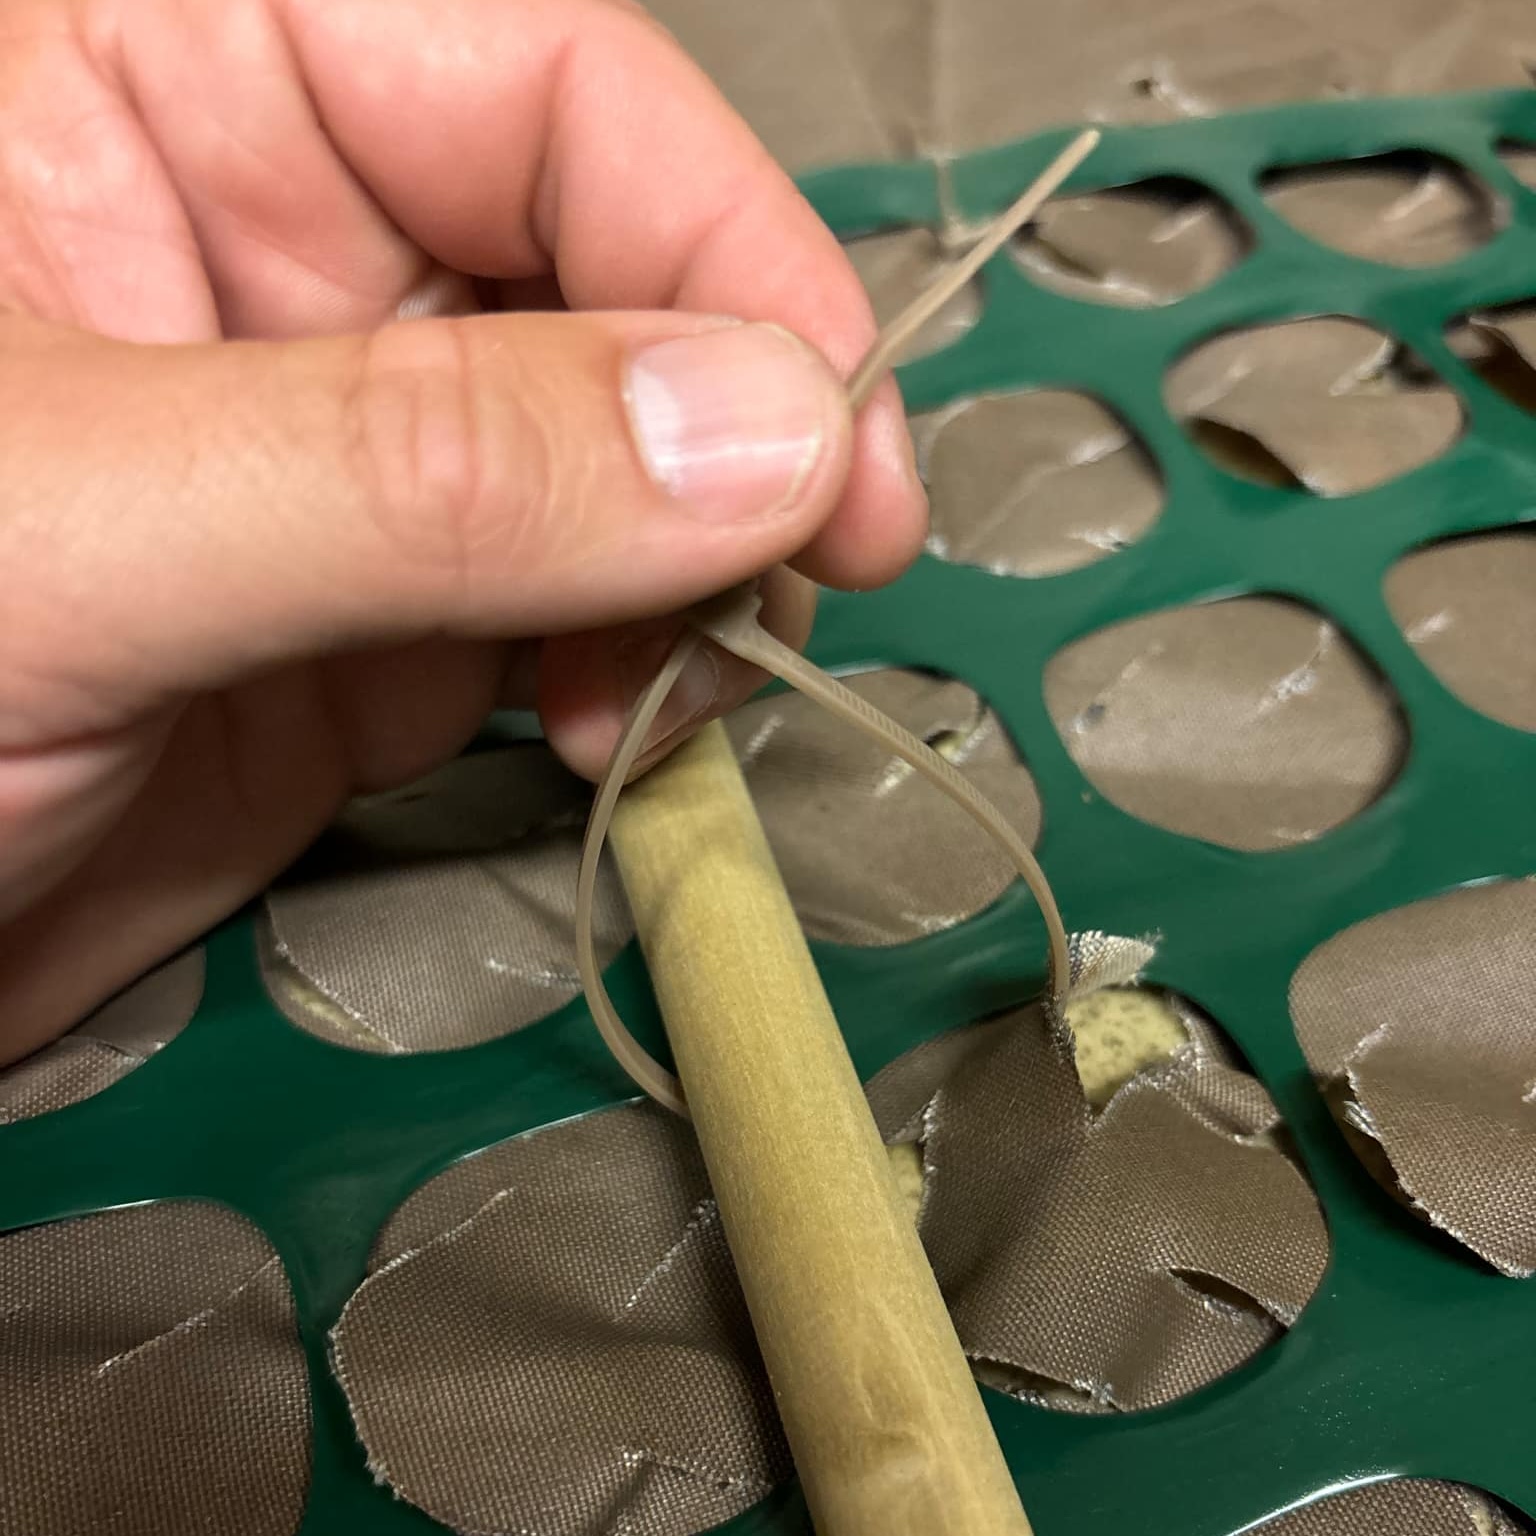
Connecting the pieces of your blind can be done with several different methods and materials. You can use twine or parachute cord, which will hold well but can be tiresome to knot. You can also sew the pieces together with heavy, waxed thread, which is guaranteed to hold together but is also incredibly tedious. If you’re looking for a quicker, less frustrating method of attachment, you can use zip ties. Choosing this route, though, you’re going to want to use short 4-inch zip ties as they’re going to take up the least amount of space and be easiest to manipulate.
Start putting your blind together by attaching the camouflage material to the framework. Your first step is to attach the edges of the frame to the camo and then work your way into the center. Be methodical as you go along, making sure to attach each section evenly by either sewing or tying the materials together between the gaps in the laid-out structure at roughly six- to eight-inch intervals.
Test the durability of the blind as you go by lifting it off the ground to make sure that there are no loose areas that can compromise the entire blind. Once you have the camo material attached to the framework, you’ll want to attach the structure.
When attaching supports to the blind, make sure you’re adhering each piece to both the framework and the blind, ensuring that it all holds together. Again, you can do this by weaving or knotting everything together, or you can just use longer zip ties wrapped around both the material and the framework. Make sure to tighten them enough so that the structure poles don’t slide or move. After piecing everything together, you should be able to lift your blind off the ground and stand it up. If there are any areas sagging or that have come unattached, be sure to fix them before taking the blind out hunting.
Setting up the blind is the final step in the assembly, though to perfect it, you still may want to add a few last touches. Stand your blind up in your chosen hunting location and then tape or weave in a bit of natural material from the spot you’re hunting. This can include dry grass, brush, cattails, etc. Anything that comes from the area where you’re chasing birds will help your blind blend in and look more natural.
You can stand your blind up in the field using several different methods. The easiest is with long garden stacks you can push into the ground and then attach to the structure of the blind with clamps or rubber bands. You can also lean the blind against a handy rock or tree, bungee it to the surrounding brush, or even wrap it around yourself in a circle and stake it down with small tent stakes. The possibilities are endless, and it’s part of what makes a portable blind so versatile.

Hiding in Plain Sight
When you have a portable blind, the only limit you’ll have as a waterfowler (aside from your shooting ability) is your own imagination. Building a portable blind allows you to make a blind that works for you, to your own specifications, so you can move to and hunt where you please. Once you build a portable blind, you realize that it doesn’t matter where or how you choose to hunt ducks, geese, or other waterfowl because you’ll be ready for whatever happens to be flying by.
Read the full article here

